Monday, April 28, 2014

Auntie knows best!


So, with that being said, let's take a look at a few pages from the scrapbook I've dedicated to my nieces.  I actually have three nieces, Paige (the oldest), Abbey (smelly middle child), and Lily (who wasn't born when I created this scrapbook).  I'll start with the cover page of the scrapbook because I always like to include a "summary" page, if you will, of what you're about to see.


Forgive the crappy quality of the photo, but who wouldn't want to continue looking at those little peanut faces for a few more pages?!  Again, like I mentioned in my previous post, I like to add a lot of photos to my pages at times and if you don't, that's okay, it'll just make for a longer, more detailed scrapbook.


These two pages were really simple to make and fairly inexpensive.  To make the words on the first page I used an alphabet stencil and two different patterns of paper, which was the most time-consuming part of the page.  It was all peel and stick from there with the stickers and the vellum quotes.  If you've never used vellum or are looking for new ways to use it, check out this short two minute video.  You'll see that creating and printing your own designs on vellum paper is much more inexpensive than buying it pre-made, and the best part?  You can customize it however you want, and it adds awesome character to your layouts.

The second Christmas layout took at most five minutes to create.  Start with one sheet of paper (doesn't matter which color) for the backdrop, and rip the second piece to your liking for a ragged, uneven effect.  Fashion a bow on the corner of your photo, add some alphabet stickers, and there you have a simple and quick scrapbook page.


Fall is one of my favorite seasons so these two pages were really fun for me to create.  Don't be afraid to alter your pictures like I did in the first one by ripping part of it off.  If you don't want to ruin your originals you can always make a copy to use instead.  Both pages were simple and easy to create and I used a lot of stencil work on the second page with the leaves.  Having a little patience can add that perfect touch to your layout.


These three pages are all of my niece, Paige Elizabeth.  I look back on these sweet and innocent days when I'm having a hard time dealing with her bratty, teenager problems.  On the last layout you see the Baby Facts and Ingredients list, which I use as often as I can find them.  Many of the local scrapbook stores that I used to go to have all closed for the most part, so I'm forced to pay the outrageous Michael's and JoAnn Fabrics prices for stickers.  Just one more reason to really tap into your creative side and create your own decals and decorations for your pages.  The new fad is digital scrapbooking and there are quite a few websites that have paper and designs made to print, below are a few:


If you have a favorite store, website, or Pinterest board, please leave a comment! 


Monday, April 21, 2014

Sneak peak of my younger years

Hello my fellow scrapbookers!  This week I'm going to show you a few more layouts using photos from my childhood.  Whenever I have a lot of photos that I can organize in chronological order, I like to keep them together between one and two pages, but it all really depends on what your scrapbook encompasses.  This particular scrapbook was titled "All About Me", so I wanted to include as many life events and holidays as possible.  As a parent you might want to break up your scrapbooks into some of the following:

  • School years
  • Holidays
  • Birthdays
  • Special events (trips to the zoo, extracurricular activities)

If you're just getting into paper crafts, breaking up your scrapbook subjects might make it easier and less overwhelming.  Doing this will also allow you to go into more detail on each page of the scrapbook, whereas my layouts can be a bit more crammed because of all the photos I wanted to include.


Pictured above are a few action pics of me playing dress-up.  There was clearly no hope for me becoming a fashion designer, with my Barney pajama pants and a slip as a cape?

Remember to include as many embarrassing photos as possible!  As you can see my mom had no problem taking pictures of me she knew I would cringe at as I got older.  I'm not a mom but I can imagine that's one of the highlights all you mothers take pride in when you're flipping through your boxes of photos.


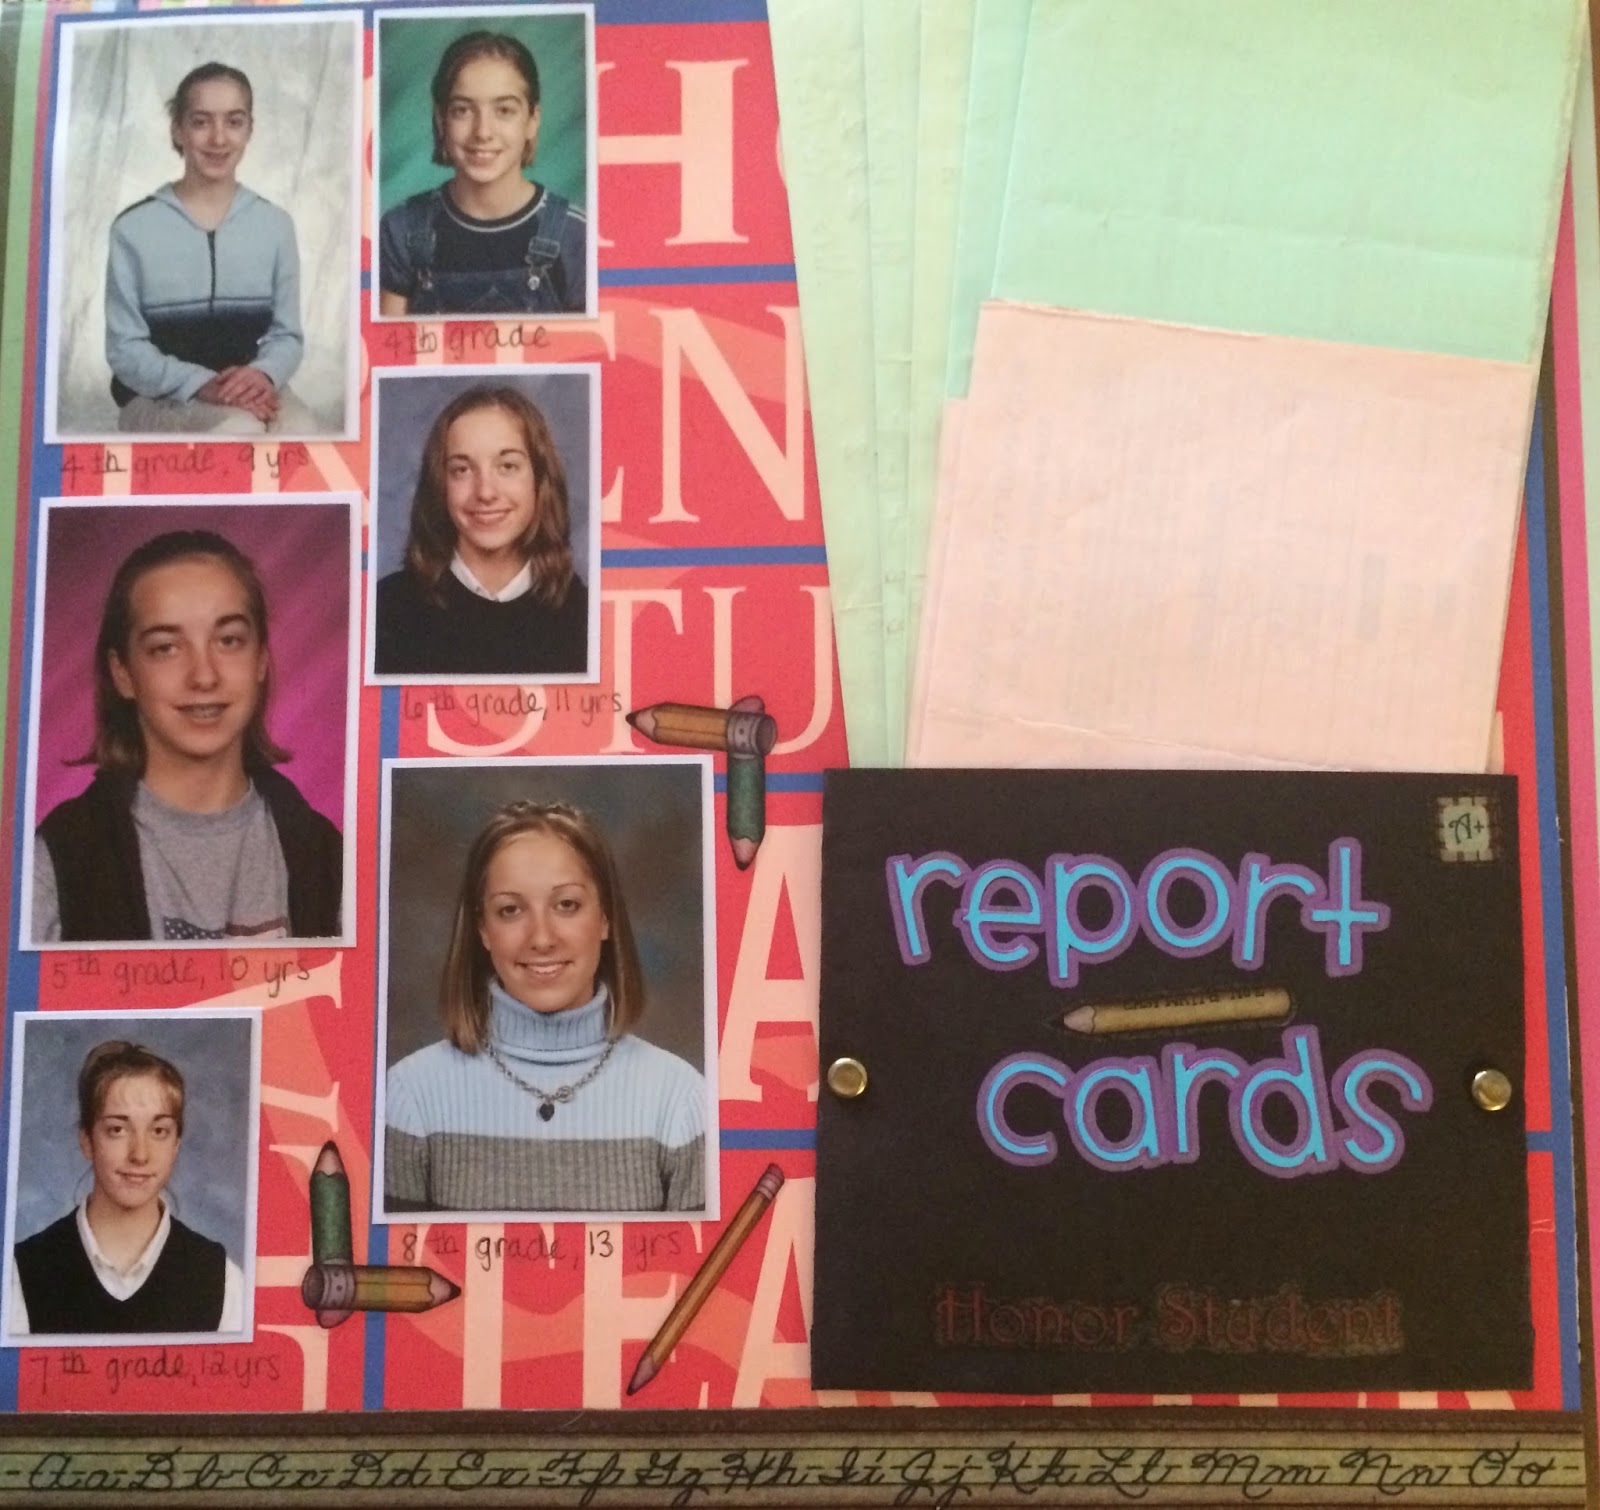
These photos of me were taken during my elementary and middle school years.  If you've ever seen the show Freaks & Geeks you'll know exactly how those years went for me.  Note to moms** if your daughter is growing a uni-brow GET RID OF IT!  You're ruining her life if you don't, just ask Madonna's daughter, I'm sure she will agree.  As you can see I added my report cards to the page by simply gluing and using a couple brads to fashion an envelope.  This is a really easy way to keep added memorabilia with the relevant pages of your scrapbook rather than showcasing them individually.  Like I mentioned earlier, if you want to add more detail rather than crowding one page I suggest you make a scrapbook just for the school years or whichever topic you choose.


Here's a page with a little more added decoration around one photo.  I love adding quotes and sayings to my pages, and you can write them yourself or purchase quote books that are stickers or rub on.  I like to use a popular brand called "Quote Stacks" because they have tons of specific quote books depending on what your topic is.

Questions? Comments? Do it!  Have fun and scrap on!


Monday, April 14, 2014

What's this blog about?


Hi there!  If you love scrapbooking, card making, and all things papercrafts then you are in the right place!  Or, if you just want a good laugh at some really terrible photos of me with a uni-brow, stick around.  My passion for scrapbooking started when I was in high school and had to create a scrapbook of whatever I wanted; so of course I chose the most interesting, awesome person to showcase, myself :) So began the semester-long process of badgering and annoying my mom to find embarrassing photos of me.

The first time I went shopping for scrapbooking paper, stickers, stamps, boarders, stencils, etc… I had no idea what I was looking for, and to this day I still don’t have anything in mind when I set out to design a page.  Steve Jobs explained this phenomenon best in my opinion:

“Creativity is just connecting things.  When you ask creative people how they did something, they feel a little guilty because they didn’t really do it; they just saw something.  It seemed obvious to them after a while.”

I think that’s what really drove my interest for creating beautiful scrapbook pages, the fact that there are no rules, no guidelines to follow, no instructions to go by, you just simply…create.  When I’m in the store I typically grab whatever speaks to me, anything I feel will compliment the theme I’m going for.  Subconsciously I know what I’m looking for but I never really know until I sit down and spontaneously create.  For example, my brand photo is a scrapbook page, and when I began setting up the layout with the materials I bought, I noticed a connection.  The background is a cloth material with a clock pattern, and the letters that spell out “Archive Junkie” are board stickers with a map overlay on each letter.  The ArchiveJunkie brand is about creating and decorating memories from different times in your life, wherever those memories take place.

Whatever your method may be for decorating your memories, always remember to have fun.  I used to get hung up on small details and creating the “perfect” page until I realized these are my memories, no one else’s.  As long as your scrapbook pages elicit some type of emotion for you when you look at them, then you are doing everything just right!  I hope this page will help inspire you, give you ideas, and make you laugh at times from my own stories and photos (because trust me, my ugly duckling stage was worse than yours).